AVR addon developer guide
NOTE: this is a work in progress
AVR Addon developer guide
Basic concepts
Scenes
Everything in AVR is organized into scenes. A single scene can contain any number of markings. The idea is that markings that somehow belong together should be in the same scene. The user can create new scenes and edit them manually. Visibility fo scenes can be toggled as a whole and sharing also works on the scene level. Scenes can also be generated and updated by addons without the user manipulating it directly at all.
AVR has a scene manager that maintains a list of all scenes, draws them every frame and also handles adding and removing scenes as well as saving scenes in saved variables when needed.
Meshes
Markings in AVR are called meshes. A mesh contains a set of vertices, lines and triangles. A vertex is essentially just a 3D point defined by its coordinates. They are all in one array and are referred to by their index in that array. Lines refer to two vertices which are the endpoints of the line. Triangles refer to three vertices which are the corners of the triangle. Lines and triangles also have some other variables such as color. One vertex can and often is used by several lines or triangles.
When a mesh is drawn, it's vertices are first transformed to match the camera position and rotation and then projected onto screen. This gives us screen coordinates, the coordinates on screen that correspond to the 3D coordinates in the world. After this the lines and triangles can be drawn using these screeen coordinates.
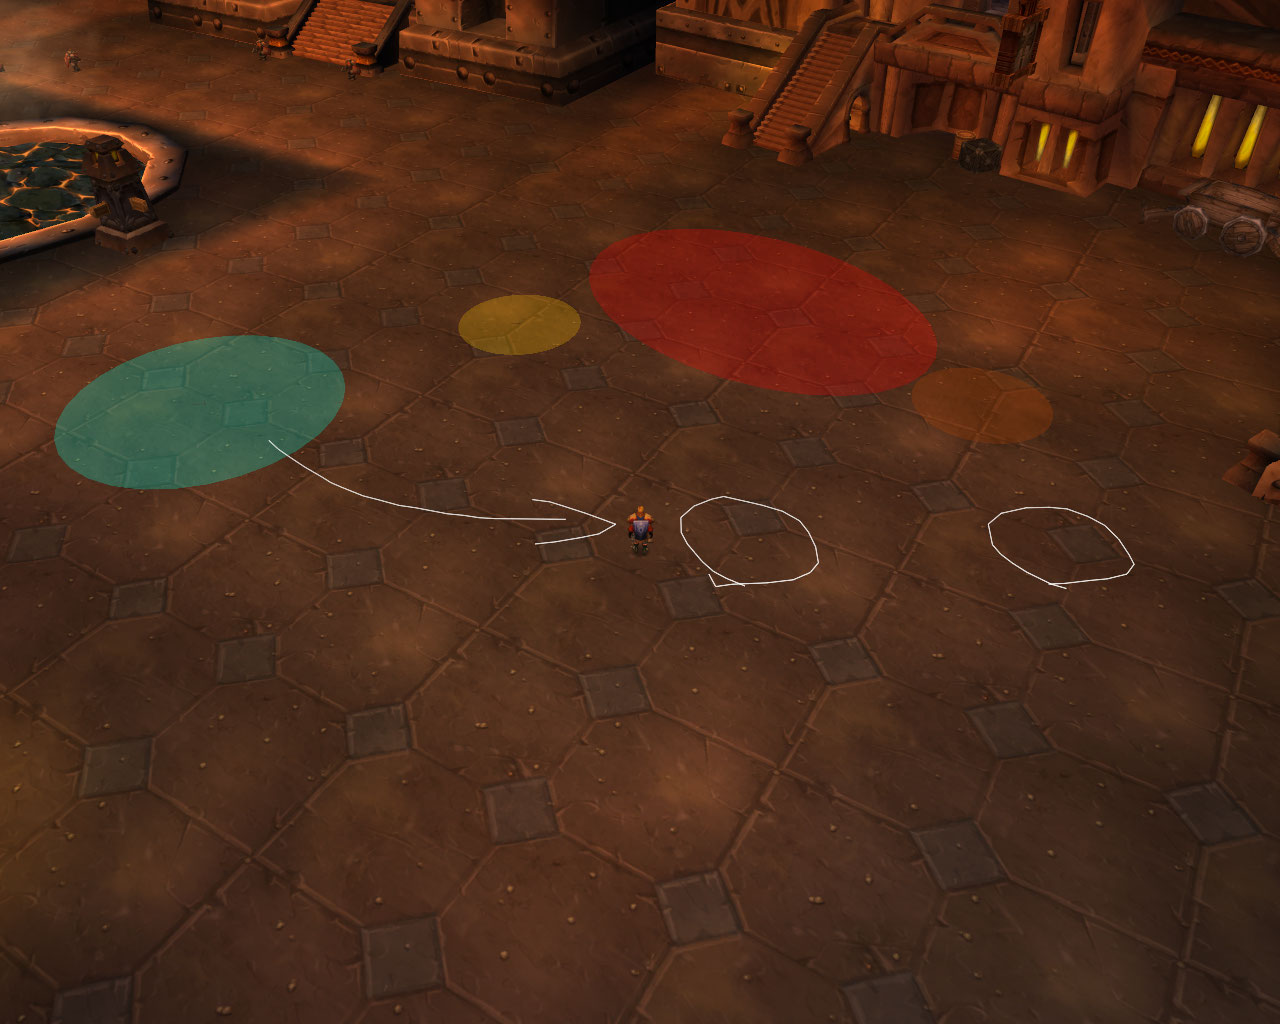
There are several premade meshes in AVR. These include a circle outline, a filled circle, the raid icons and an arrow. To use these you don't have to setup the vertices, lines, and triangles yourself. Instead you set some high level parameters such as a circle radius or the length of the arrow and the vertices, triangles and lines are generated for you. It is also possible to make your own custom meshes if you need more complex shapes.
Using AVR in your addon
TOC file
Currently AVR is only available as a standalone addon that can be used by other addons. It's not available as a library that can be included with your addon. To use AVR in your addon you should either set it in Dependencies or OptionalDeps in your TOC file.
If your addon is totally dependent on AVR and can't do anything useful without it then use Dependencies.
## Dependencies: AVR
If your addon can function without AVR then use OptionalDeps.
## OptionalDeps: AVR
Your users will still need to download AVR separately. The dependencies tells the game that if AVR isn't installed then it shouldn't load your addon either. OptionalDeps tells it that if AVR is installed then load it before your addon so you can then use it. Some addon updaters may also read the TOC file and automatically install dependencies.
Creating a scene for your addon
As was said above, some scenes a user can edit directly and some scenes are controlled by an addon. Most of the time only one of these applies. An addon can naturally provide settings in option dialogs that control what is being shown in the scene but the user isn't directly manipulating the meshes in the scene. Because of this, scenes that are used by addons should be hidden from the default AVR options dialog.
In addition to this, usually it makes little sense to save these scenes in saved variables. Instead they are recreated based on other data. For example, suppose an addon that draws mining node positions with AVR. There's no need to save an AVR scene which contains markers for the nodes. The node positions are saved in some other data structure and the AVR scene can easily be recreated based on that data.
AVR has a ready function to make scenes that are neither visible in the default options nor saved in saved variables. This is what you should use most of the time for AVR enabled addons. You access AVR using the global variable AVR. You should first make sure that the AVR variable is defined. If it's not then the user doesn't have AVR installed.
if AVR then
    scene=AVR:GetTempScene(sceneId)
end
The scene id is any string that's unlikely to be used by another addon. Your addon name plus something is a good idea. If you pass it the same string later you will get the same scene. If no scene for that id exists yet a new one is created. The scene is temporary in the sense that it is not saved in saved variables. It will however persist until the user logs out or reloads ui.
Usually one scene for your addon is enough, though in some cases you may want to use two or more. However, you shouldn't be creating new scenes by passing new scene identifiers all the time.
Creating and modifying meshes
You create new meshes by simply calling the constructor of the mesh class. AVR has several ready mesh classes available:
- AVRCircleMesh - A circle outline
- AVRFilledCircleMesh - A filled circle
- AVRTimerCircleMesh - A filled circle with a spiral timer
- AVRArrowMesh - A simple arrow
- AVRRaidIconMesh - A raid icon, all of them are done by the same mesh class
- AVRMarkerMesh - A high contrast marker that can be used to mark players or other locations.
New meshes are constructed by calling the New method. They can always be called without any parameters but many of the mesh classes also accept some parameters to set things like the circle radius. All the parameters can also be set later on using different methods. For example:
    local mesh=AVRFilledCircleMesh:New(10) -- 10 yard radius
    mesh:SetColor(1,0,0,0.5) -- r,g,b,a, full red with 50% alpha
You also need to either set the position for the mesh or make it follow a target. If you make it follow a target then the mesh position should be the origin (default) or a small distance from it if you want the mesh to be offset from the followed target.
    -- instead of "focus" you can also use the
    -- name of the unit, "focustarget" etc.
    mesh:SetFollowUnit("focus")
To place the mesh in a specific static location use the SetMeshTranslate method. Coordinates in AVR are in yards with origin at the lower left corner of current map, Y-coordinate increases north.
You'll often want to place the mesh under some other player. To do this you first need the coordinates of the other player. For units in your raid you can use the GetUnitPosition method in the threed object.
    local x,y=AVR.threed:GetUnitPosition("focus")
    -- GetUnitPosition returns nil if coordinates
    -- for the specified target are not available
    if not x then
        -- remove the mesh, make it invisible or
        -- do whatever else is appropriate
    else
        mesh:SetMeshTranslate(x,y)
    end
Manipulating your scene
Once you have your scene and one or more meshes, you need to add those meshes in the scene. To do this use the AddMesh method of the scene.
scene:AddMesh(mesh)
The mesh should become visible on next OnUpdate, supposing that the scene itself is visible. You can still modify the mesh properties as much as you want even though it's already added to the scene. To remove the mesh you call the Remove method of the mesh.
mesh:Remove()
You can also remove all meshes from a scene with the ClearScene method.
scene:ClearScene()
Visibility of a scene can be toggled with the visible variable.
scene.visible=false
All meshes will still be in the scene, the scene as a whole just will not be drawn. When you reset visible to true all meshes will appear again.
If you created your scene with the GetTempScene method then there is no need to specifically remove the scene. When you don't need it you should still clear it or make it invisible.
Comments